0


What says “Celebrate!” more than glitter and fringe? Nothing. That’s what.
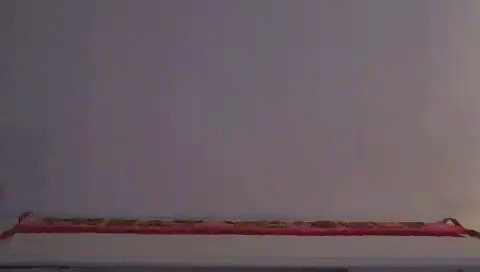
When planning my friend Emily’s birthday party recently, I had to come up with a way to transform the everyday bar into a space as amazing as she is. Plus, we totally had to wow her as she walked in, since the get together was a surprise. So, the glitter fringe banner above was born.
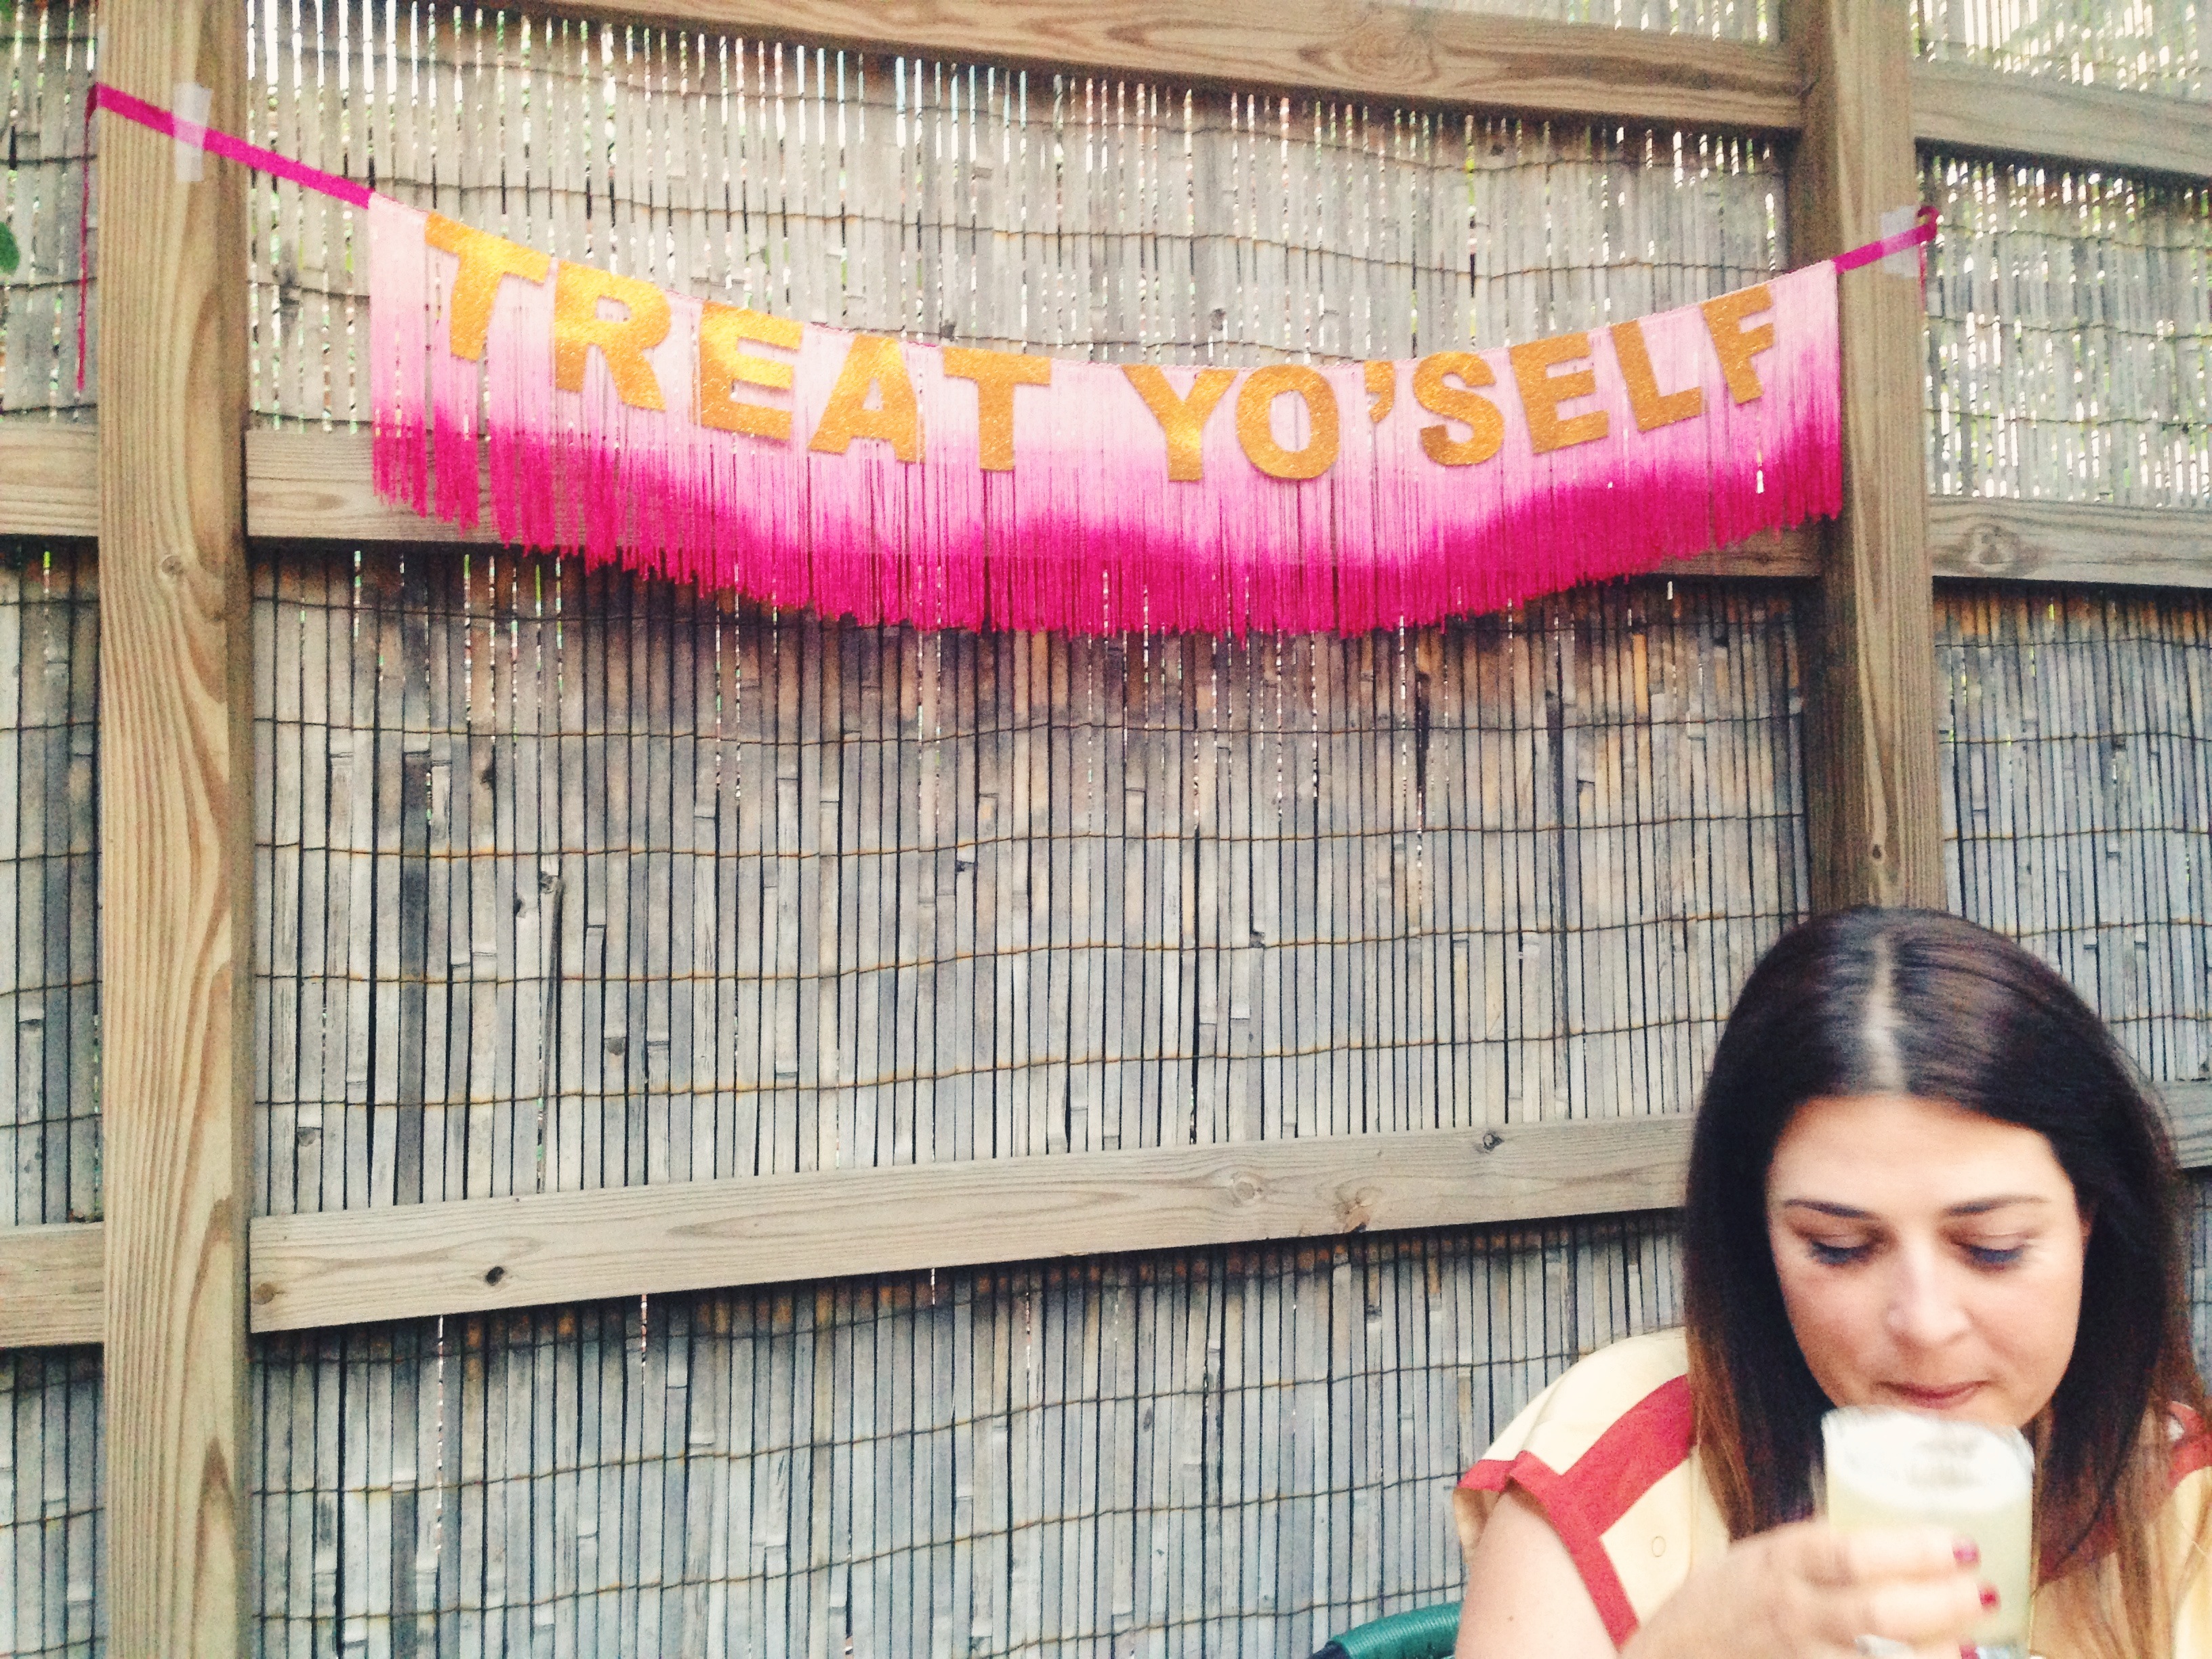
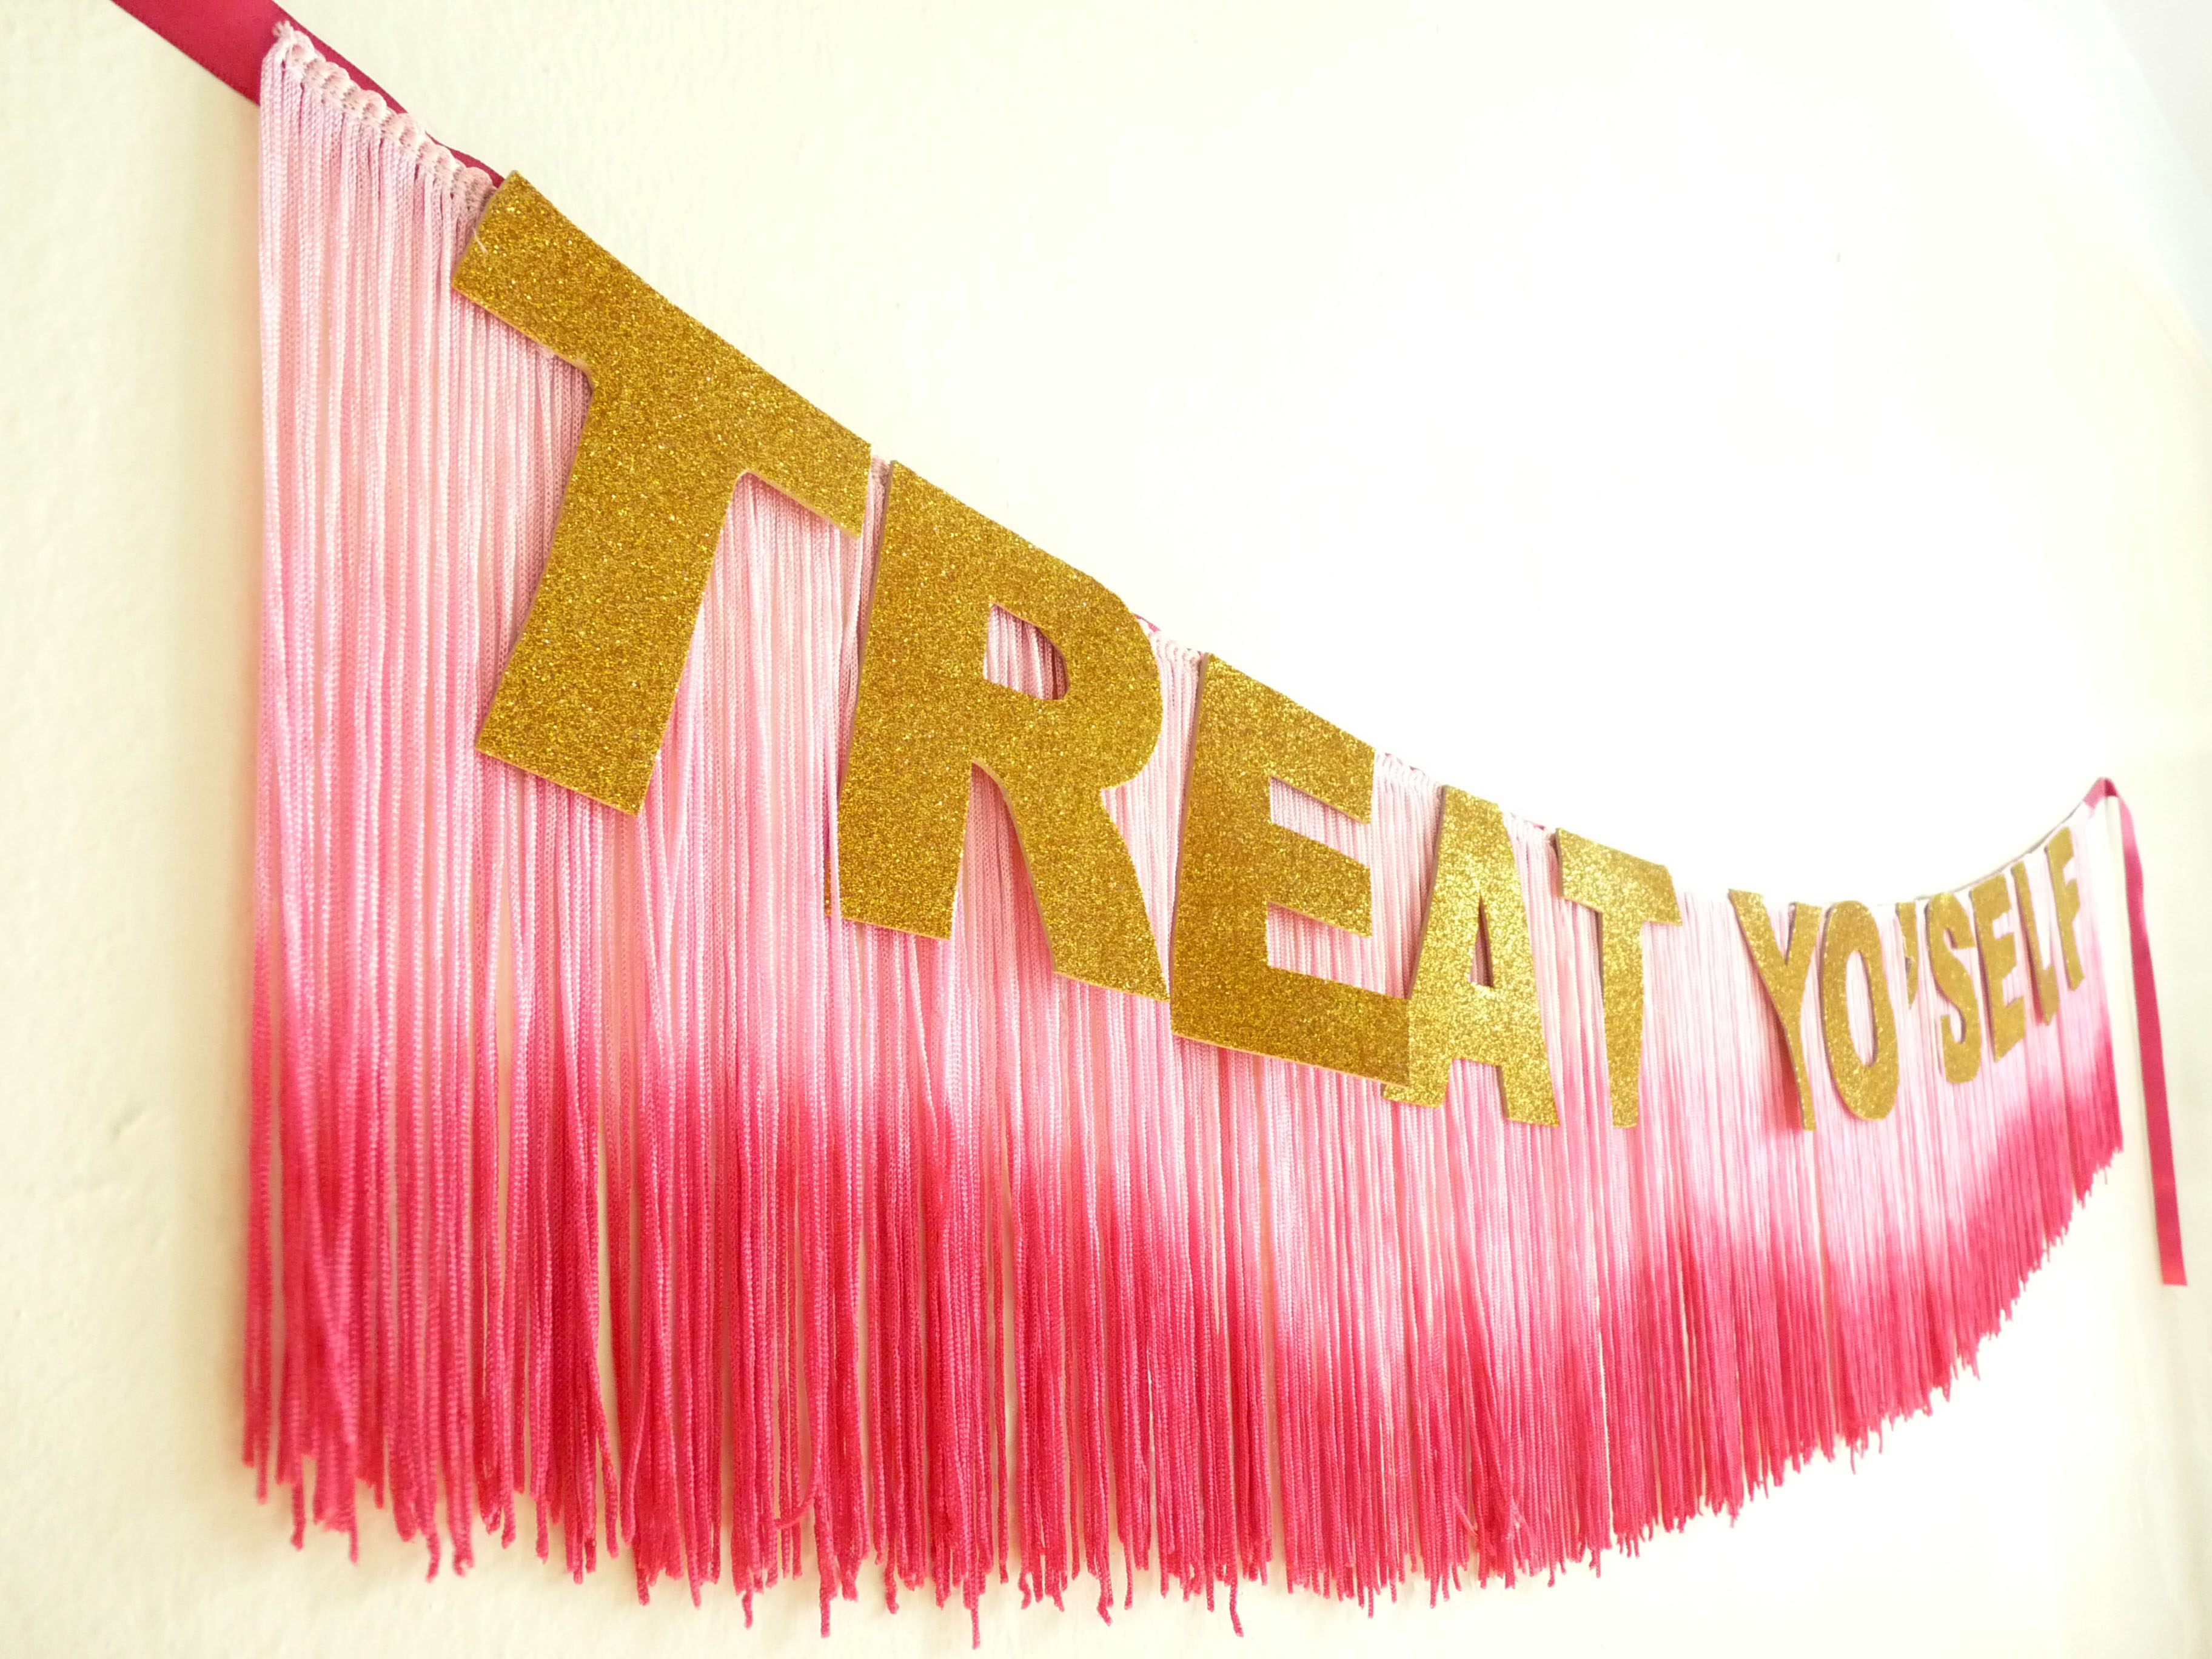
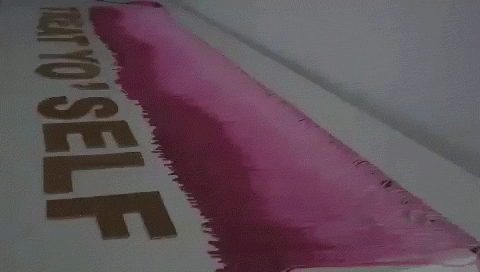
Once the banner was underway and the ombré fringe was procured, the hardest part of assembling the whole thing was deciding on which phrase to showcase in magnificent gold glitter. A few phrases were suggested, but none quite captured the birthday spirit like “TREAT YO’ SELF.” Though we didn’t have mimosas, massages, or fine-leather goods that night, we did have plenty of margaritas and guacamole, and I’d like to think the birthday girl felt as special as we all think she is.
Want to make your own glitter fringe banner? It’s so easy! Just follow the steps below:
SHOPPING LIST:
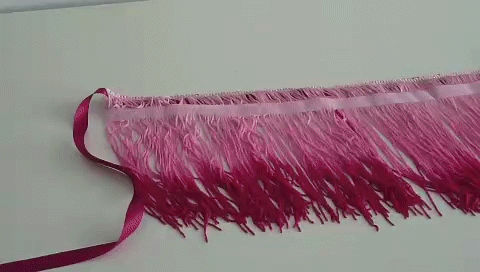
- 9-inch-long fringe (I used 1 1/2 yards that I found at M&J)
- 5/8-inch-wide double-sided satin ribbon (I used 2 1/2 yards. Just make sure it’s about 1 yard longer than the fringe)
- Darice Glitter Foam Sheets (I fit 6 letters per sheet)
- Hot-glue gun
- Hot glue
- Thread
- Scissors
- Pen or pencil
- Sewing machine
- Computer with printer (see step 6)
- Scotch tape (optional. See step 2)
HOW TO:
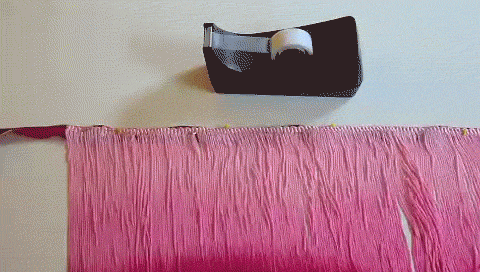
1. Pin the fringe to the ribbon. Center the fringe on the ribbon with the fringe’s top edge even with the ribbon’s. You want the fringe’s flange (or finished edge) to be on top of the ribbon. Add as many pins as you want to help keep the fringe secure. If you did like me and cut your ribbon one yard longer than your fringe, position the fringe 18 inches from one ribbon end. Once you get it all pinned down, you should then have 18 inches of ribbon left over at the opposite end.

2. Stabilize and secure the fringe. To help keep the fringe out of the way while sewing, I like to use a bit of Scotch tape. To make it a little less sticky, I usually press it on my arm first to weaken the adhesive. That way when I pull it off later, it won’t snag or damage the fringe. Tape all along the fringe, close to the ribbon. Be careful not to tape over the ribbon area.
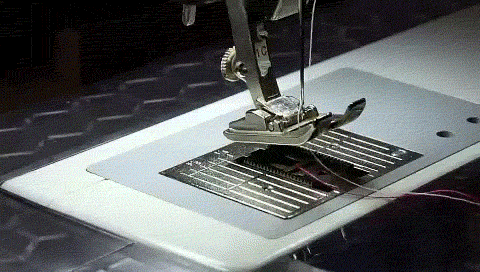
3. Attach the fringe to the ribbon. Using a straight stitch on the sewing machine, sew the fringe to the ribbon, backstitching at the beginning and end of the stitch to secure it in place. Sew down the center of the fringe’s flange (or finished edge). Make sure to brush the fringe out of the way as you sew. The tape should help do most of the job, but make sure to keep an eye on the fringe pieces, so they don’t accidentally get sewn to the ribbon.
4. Remove the tape. Pull the tape off the fringe, being careful not to damage the fringe as you go. You don’t want to snag anything now that you have it attached to the ribbon.
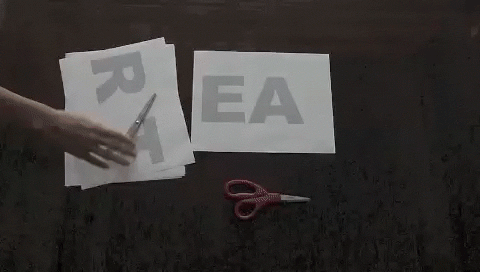
5. Make the letter patterns. Using a computer and printer, print out your phrase onto paper. I used Arial Black font in 400pt. Once you get all of your letters printed, cut out each one.
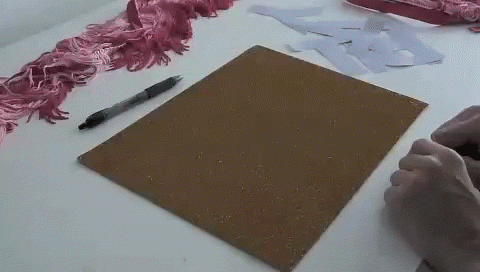
6. Transfer the letters to the glitter foam sheets. Turn your glitter sheet over so that it’s face-down on your work surface. Next, place the letter patterns on the sheet’s wrong side. Make sure each letter is face down (they’ll look backwards, but that’s okay since you’re looking at their back side). I like to place all of my letters out first before I trace them. That way I know I have enough sheets to cut them from. TIP: If you have temporary spray adhesive, you can use that to stick the letters to the sheet’s wrong side. Then you don’t have to trace them out before you cut. Just make sure you peel the paper letters off before you glue the glitter pieces to the fringe.
7. Cut out the glitter letters. Make sure you also cut out all of the open areas on the letters like A and O.
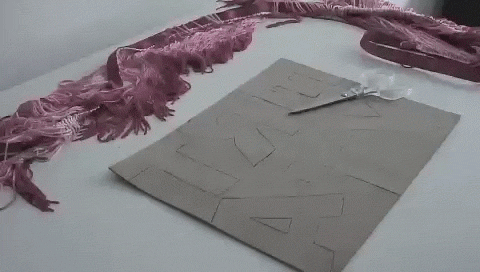
8. Attach the letters to the banner. Lay the fringe and ribbon out flat, with all of the fringe pieces smoothed out. Arrange your letters the way you want them below the banner and space them out how you like (you can always use a ruler or tape measure to make sure you’re spacing things evenly). Once you get your letters spelled out correctly (double check!), hot glue each letter to the banner. Use only one thin bead of glue along the top edge of each letter so that it adheres to the fringe’s flange and ribbon ONLY. You don’t want the letters to adhere to the fringe pieces below the flange. Keep those suckers wild and free.
9. You’re done! Now treat yo’ self and hang this sucker up!

Emily, high-fiving a million angels.
Nik
Nicole Smith is an author, editor, designer, and instructor who lives in Brooklyn, New York. Check out her latest book, Skirt-A-Day Sewing, out now at your local bookstore, or online.
Hello there,

Hey. My name is Nik, Etsy merchandiser by day and designer, author, and teacher by night. For more about me, click here.
Elsewhere
Bookshelf (Titles by me)
 |
Skirt-A-Day by Nicole Smith Storey Publishing (Shipping June 2013) |
 |
Dorm Decor by Theresa Gonzalez and Nicole Smith Chronicle Books |
 |
Fashion DIY by Carrie Blaydes and Nicole Smith Sixth & Spring Books |